Getting Started
On this webpage, we provide you with information about the connection speed and equipment you will need to be able to use Zoom. You will also find instructions about how to install and log into Zoom, and where to find your meetings. We recommend that you use a computer for Zoom.
For good quality digital meetings, an Internet connection of at least 1.5 Mbit/s is recommended. However, if you have a slower connection, the system will adapt to this.
You can check your Internet connection speed on Bredbandskollen.se.
Information about system requirements (Zoom Help Center)
Equipment
Use a headset or a table microphone and web camera for the best sound and picture quality. As an employee, contact the NGL-centrum for equipment.
More information about headsets, table microphone and web cameras (in Swedish)
Download the app from the Zoom Download Center website.
- Click on "Download" under "Zoom Client for Meetings".
- Run the installation programme.
Note that new versions of Zoom are being developed on an ongoing basis. The easiest way to update is to use the Zoom app.
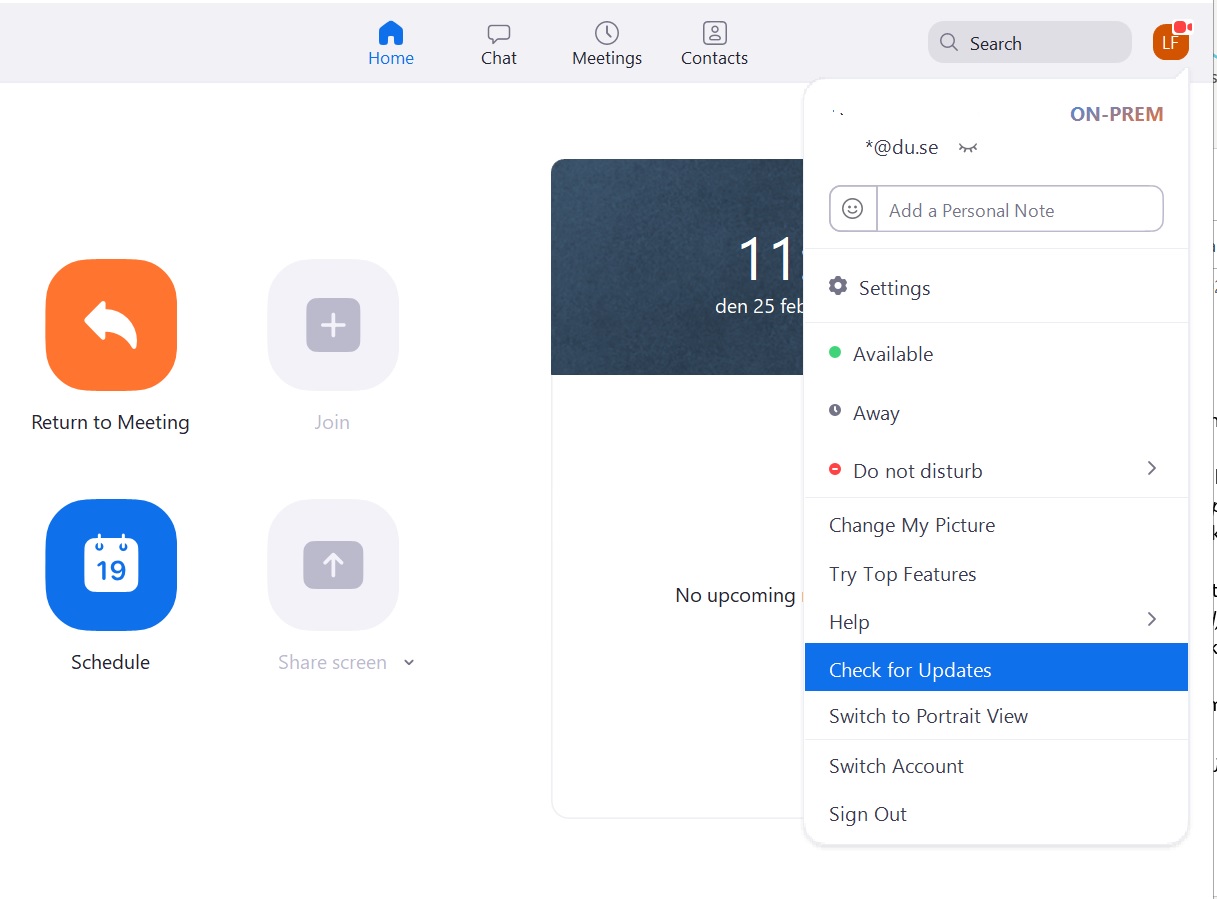
- Open the Zoom app.
- Click on your initials or your picture in the top-right corner.
- Choose "Check for Updates".
Dalarna University has signed a contract with Zoom so that you and students can use digital meetings in a more secure Zoom environment. To access Zoom securely, log in using SSO (this stands for Single Sign-on and is an authentication scheme).
Log In
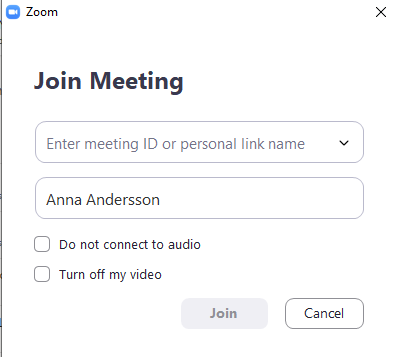
- When the Zoom-app has been installed, a box will appear stating "Join a Meeting".
- Click on "Sign in with SSO" at the top right.
- Type in the university’s domain name "du-se" in the box "Company Domain". Click on "Continue".
- Log in using the university’s "cas-inloggning".
- If you do not come to "cas-inloggning", then this means you are already logged in.
Note that you need to log in via SSO on each new device that you want to use for Zoom.
SSO Log-In Advantages:
- Your full correct name automatically appears.
- You avoid ending up in a Zoom waiting room.
- You get your own permanent link to a personal Zoom meeting: this you can record and secure.
- You can create your own links to recurring Zoom meetings with access to your own Breakout Rooms.
- You get acess to the more secure Zoom environment.
Log Out
If you have already created a user account on Zoom, then we recommend that you log out and then log in again in the secure Zoom environment via SSO. To log out:
- Open Zoom and click on your initials in the top-right corner.
- Choose "Sign out".
- Log in again by following the instructions above.
Further instructions (Zoom Help Center)
Meeting ID link
If you have a Meeting ID link, you can join a meeting directly. You will receive this Meeting ID link in the meeting invitation by email or in Canvas.
You will find your personal meeting link on your Zoom Profile Page.
On Zoom’s own webpage, there are instructions about how to join a meeting using your meeting ID.
Digital Meetings Scheduled Using TimeEdit
On the webpage List of Digital Meetings, you can find, for example, digital meetings, seminars, workshops, lectures and presentations that have been scheduled in the university’s central booking system TimeEdit.
On the webpage du-se.zoom.us/profile, you can find your Zoom profile page.
On your profile page, you can:
- Alternatively, you can choose to schedule a Zoom meeting without using TimeEdit. Follows these steps instead:
- Click on "Schedule a meeting".
- Choose the "Topic" for the meeting. Provide the most important information first – for example, course code. If Support Services need to help somebody find a meeting that is underway, they search by meeting title and the name of the person who scheduled the meeting.
- You can edit the settings for a meeting: for example, security, video, audio. You can also make a "Co-Host".
- A Co-Host can also run the meeting, which is useful if you are not going to be at the meeting for its duration. The Co-Host has the same rights as the Host and can access the same functions as the Host.
- Schedule recurring meetings:
- Choose "Recurring Meeting".
- Change from "No Fixed Time" under "Recurrence".
We recommend that you use a computer for Zoom; however, you can also use a mobile device. On the Zoom website, you can read about using a mobile device for Zoom.
Instructions: mobile (Zoom Help Center)
Schedule a Digital Meeting for Your Teaching
Use the central booking system TimeEdit to schedule digital meetings for your teaching. Digital meetings scheduled using TimeEdit are connected to the university’s secure Zoom environment and are visible in the schedule on the student web.
Schedule a Digital Meeting Using Outlook
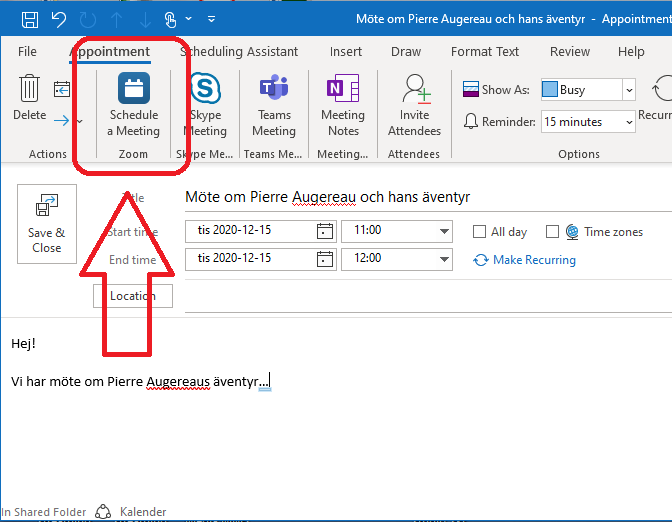
Download and install the programme Zoom Plugin for Microsoft Outlook.
- Go to your Outlook calendar.
- Click on "Schedule a Meeting, Zoom".
Schedule a Digital Meeting using the Zoom App
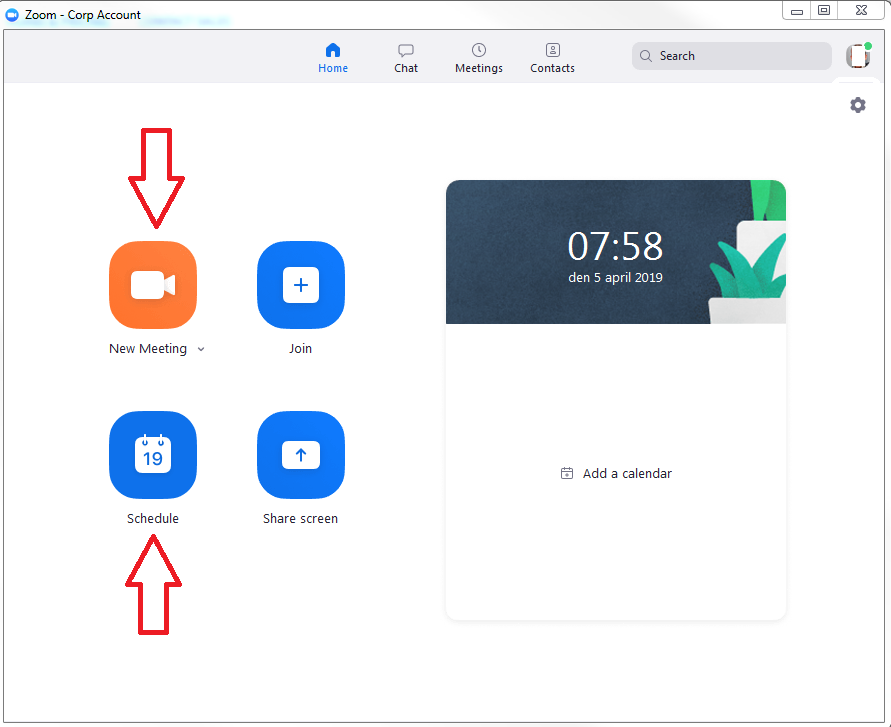
- Log into the Zoom App.
- Click on "Schedule" to set up a meeting.
- Choose "New Meeting" to schedule a new meeting. You will get a meeting link or an invitation that you can send to the people you want to invite to the meeting.
- Choose the "Topic" for the meeting. Provide the most important information first – for example, course code. If Support Services need to help somebody find a meeting that is underway, they search by meeting title and the name of the person who scheduled the meeting.
- You can edit the settings for a meeting: for example, security, video, audio. You can also make a "Co-Host".
- A Co-Host can also run the meeting, which is useful if you are not going to be at the meeting for its duration. The Co-Host has the same rights as the Host and can access the same functions as the Host.
Schedule a recurring meeting
You can also schedule recurring meetings from your Zoom profile page.
- Select "Recurring Meeting".
- Switch from "No Fixed Time" under "Recurrence".
Participate in a Digital Meeting
Here follow some tips and recommendations for the use of settings during a digital meeting.
To be heard (speaker) and to hear (microphone), you need to set up your audio so that it connects to the digital meeting. You will enter the meeting with your audio on unless you click on: “Do not connect to audio”.
Connect Audio During a Meeting
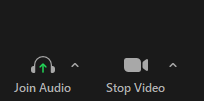
- Click on the arrow beside the headset symbol.
- Choose the audio source you want to use under "Select a Microphone".
Turn Off/Turn On Your Microphone During a Meeting
- To turn off your audio, click on "Mute". A red diagonal line will appear across the microphone symbol.
- To start your microphone, click on "Unmute" at the bottom left.
Disconnect Audio in Zoom
- For the settings for audio and microphone, click on the microphone symbol.
- Choose "Leave Computer Audio".
Possible Problems
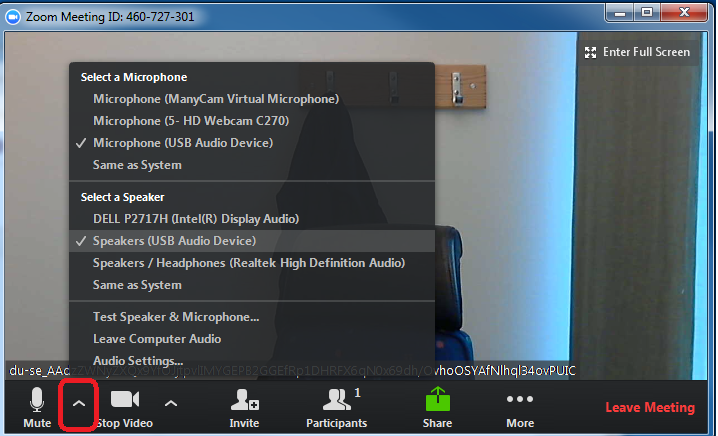
- Click the arrow to the right of the microphone to see which microphone and speaker is active.
- Try selecting one of the other microphone and/or speaker sources.
- Click on "Test Speaker & Microphone" to test the sound.
Test your audio before a meeting (Zoom Help Center)
Turn On Video

Turn on your video when you connect to a digital meeting. You will enter a meeting with your video on unless you click on: "Turn off my video".
Start Your Video During a Digital Meeting
- Click on the arrow beside the video symbol.
- Select the video source you want to use under "Select a Camera".
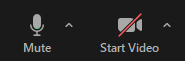
Turn Off or Start Your Video During a Digital Meeting
- Turn off your video by clicking on "Stop Video". A red diagonal line will appear.
- Turn on your video by clicking on "Start Video" beside the video symbol at the bottom left.
Possible Problems
- Click on settings for video – the arrow beside the video symbol.
- There you can see your available video sources.
Instructions for testing your video settings (Zoom Help Center)
Raising Hand
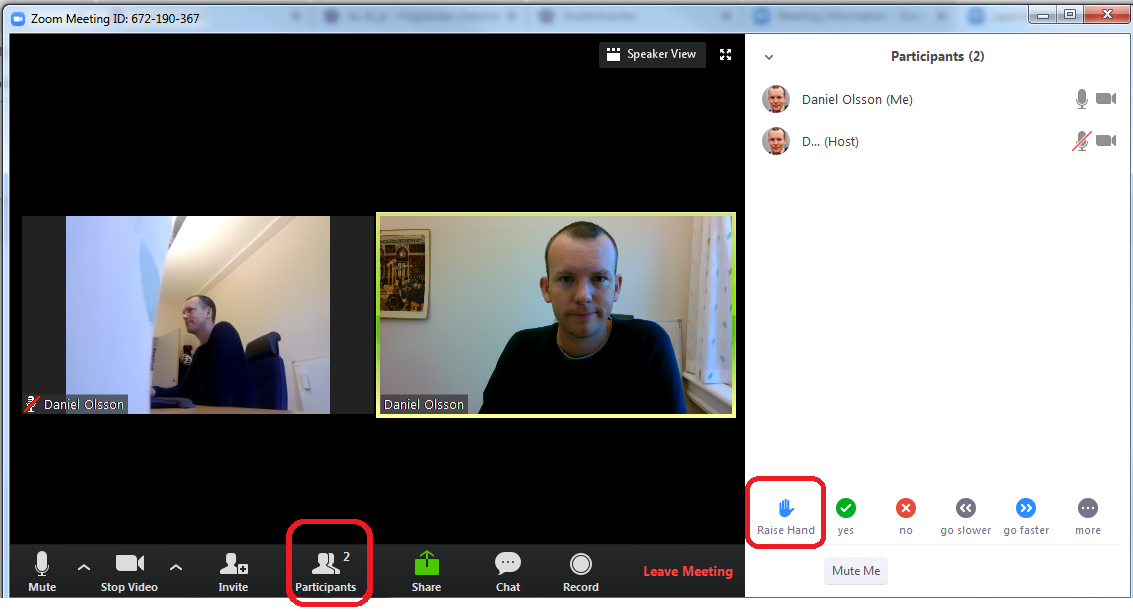
Participants
- Use the function "Raise Hand" to indicate you would like attention from the host or other participants.
- When you are a participant, you will find this function under "Participants".
- To lower your hand, you must click on the "Raise Hand" symbol again.
Host and Co-host
- When you are Host, you will see a blue picture with a white hand in the participant’s video image with the text "XX Raised Hand".
- As Host, you will see who has raised their hand under "Manage participants".
- You cannot see the order in which somebody raises their hand. The person who has raised their hand must click on the hand symbol again for it to disappear.
- As Host and Co-host, the "Raise hand" function is not available when sharing screen.
Instructions for raising hand (Zoom Help Center)
Chat
During a meeting, participants can chat with one another and ask questions.
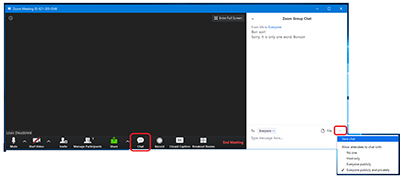
- Click on "Chat" in the lower menu bar.
- You can send messages that everyone will see by choosing "To Everyone".
- You can send private messages to (a) specific participant(s) using "Direct Message". Choose the person’s name in the list of participants. Only the person you choose to send to will see your message.
Save chat
Participants
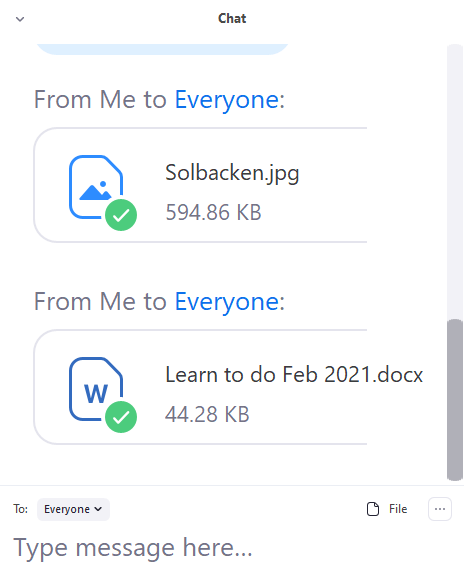
- To save what has been written, open the chat and choose "Save chat".
- Click on the three dots to the right of "File".
- Select "Save chat".
- The chat is saved on your computer in the folder document / Zoom.
Host
- When you are Host of a meeting, the chat is saved automatically on your computer in the folder document / Zoom.
Reactions

- In the panel at the bottom of the Zoom screen, you can choose different reactions.
- This is useful on those occasions when you or another participant wants to give a reaction to something that somebody says during the meeting.
- The reaction symbol appears on your video picture before disappearing automatically.
You can share material with other participants in the meeting by sharing screen or you can use the chat function if you want to send a file, text or link.
Share Your Screen
(For example, a Word document or a PowerPoint)
- Close any documents that you do not need in the meeting to make it easier to find what you want to share.
- Click on "Share Screen".

- Select what you want to share.
- Click on "Share".
- A green box will indicate the material that you are sharing.
Instructions for sharing your screen (Zoom Help Center)
Share Material in Chat
You can use the chat function if you want to send files to other participants during the meeting.
- Click on "Chat" in the lower menu bar.
- You can send messages that everyone will see by choosing "To Everyone".
- You can send private messages to (a) specific participant(s) using "Direct Message". Choose the person’s name in the list of participants.
- Click on "File" to the right of the recipient's name.
- Double-click the file to send.
To share material via link or text, see instructions under "Chat".
Share Video with Audio
- Open the video you want to share.
- Use the function “Share screen”.
- Click in the box "Share sound".
It is the Host who can create group rooms in Zoom: these are called "breakout rooms". The Host decides on the number of breakout rooms. There are three different ways of grouping.
Create Breakout Rooms
-
- Click on "Create Breakout Rooms".
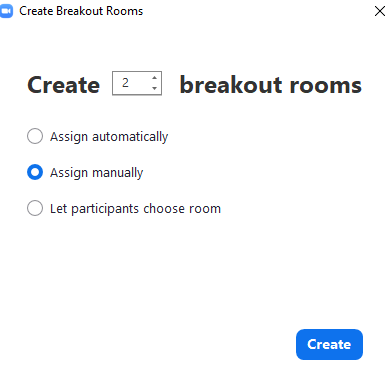
- Choose the number of breakout rooms you want.
- There are three different ways of grouping:
- If you have chosen to divide participants into random groups, then each participant will get a breakout room.
- You can let the participants choose groups themselves.
- If you choose to divide participants into breakout rooms of your choice, then you need to allocate them a room.
- Click on "Create Breakout Rooms".
-
- Click on "Assign" to the right of the breakout room, and a list of participants will appear.
- Click on those who will be in the respective breakout room.
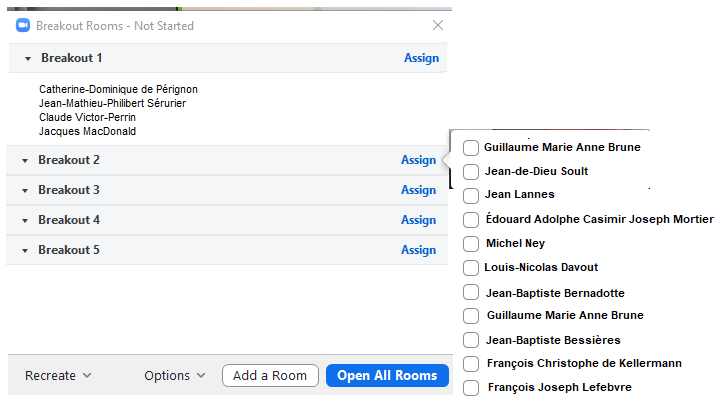
- Do this for each breakout room.
Move Participants Between Breakout Rooms
- Hold the mouse over the name of the participant you want to move.
- Choose "Move to..."
- Choose "Exchange with..." if you want two participants to exchange rooms with each other.
Settings for Breakout Rooms
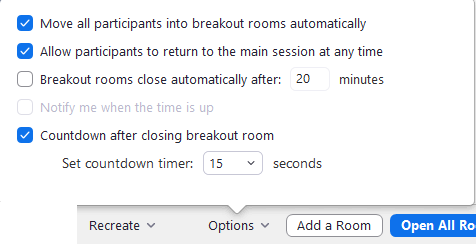
Under "Options", you can find the settings for the breakout rooms.
- You can allow participants to return to the main room (main session, see below) when they want to. This is useful when a participant wants to ask you a question and then return to the breakout room.
- You can set how long in minutes the breakout rooms will stay open: after this, they will automatically close.
- If you do not select automatic closing of group rooms, you must close them manually.
- If participants are to receive a warning before the rooms close, check "Countdown" and enter a countdown time.
- When the participants are to be moved to the breakout rooms, click on "Open all rooms".
As a Host, you can send a short text message to the breakout rooms.
Participants can leave their breakout room by clicking on "Leave Room", see the countdown timer and request help from the Host with "Ask for help".
Instructions for breakout rooms (Zoom Help Center)
Manage breakout rooms (Zoom Help Center)
When you are Host, you can select a Co-host. You can select a Co-host both during a meeting and when you schedule a meeting. A Co-host can, for example, use the function for breakout rooms.
During a Meeting
- Click on the three dots at the top right in the participant’s video picture.
- From the menu choose "Make Co-host".
Or:
- Click on "Manage participants".
- Click on "More" to the right of the participant’s name.
- Choose "Make Co-host" from the menu.
For information about how to select a co-host when you schedule the meeting, see "Schedule a Digital Meeting".
If you are Host and need to leave the meeting, you need to select a Co-host who can act as Host after you have left. If you do not do this, the meeting will end for all participants.
Security
As Host of a digital meeting, you have access to the functions that ensure meeting security. For example, you can enable the waiting room function, and you can also remove participants from a digital meeting.
You can use the waiting room function to control who can access the digital meeting. Those who log in via SSO access the meeting directly when it is scheduled in TimeEdit. Those who do not log in via SSO will come to the waiting room. If you schedule your digital meeting yourself (using Outlook, the Zoom app or your profile page), then you can choose whether or not you want to use the waiting room.
Host
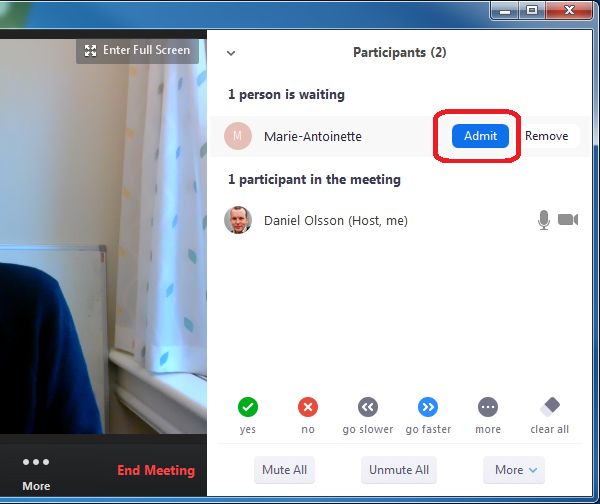
- As Host, you can see who is in the waiting room in your list of participants.
- You will receive a message when somebody is in the waiting room.
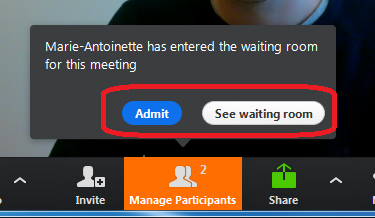
- You can choose who you want to allow into the meeting by clicking on "Admit" or "Admit All"
- You can write a message in chat to participants in the waiting room; however, they will not be able to write back.
Participants in the Waiting Room
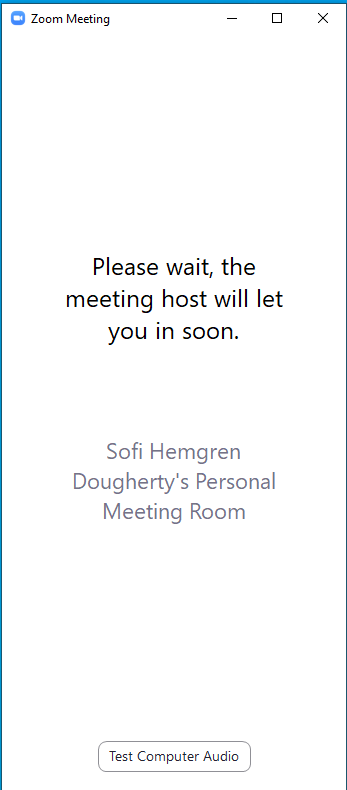
- Wait for the Host to admit you into the meeting.
- A participant in the waiting room cannot see who else is in the waiting room.
- In the waiting room, participants can test their audio by clicking on "Test Computer Audio".
Move Participants to the Waiting Room
During a meeting, you can move participants to the waiting room. This is useful for the purposes of supervision and examinations.
- Choose "Manage participants".
- Move participants to the waiting room by clicking on "Put on hold".
- To admit participants into a meeting, click on "Put off hold".
- Choose "Remove" to completely remove a participant from a meeting.
As Host or Co-host, you can remove “unauthenticated users”.
- Click on "Security".
- Select the participant you want to remove from the meeting by clicking on "Remove Participant".
Want to know more?
On the webpage More Zoom Functions, you can find information about other functions and instructions for how to use them.